


Blog
Tips for Connecting a REL Subwoofer High Level
The below text is a transcription of the video.
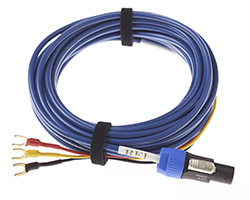
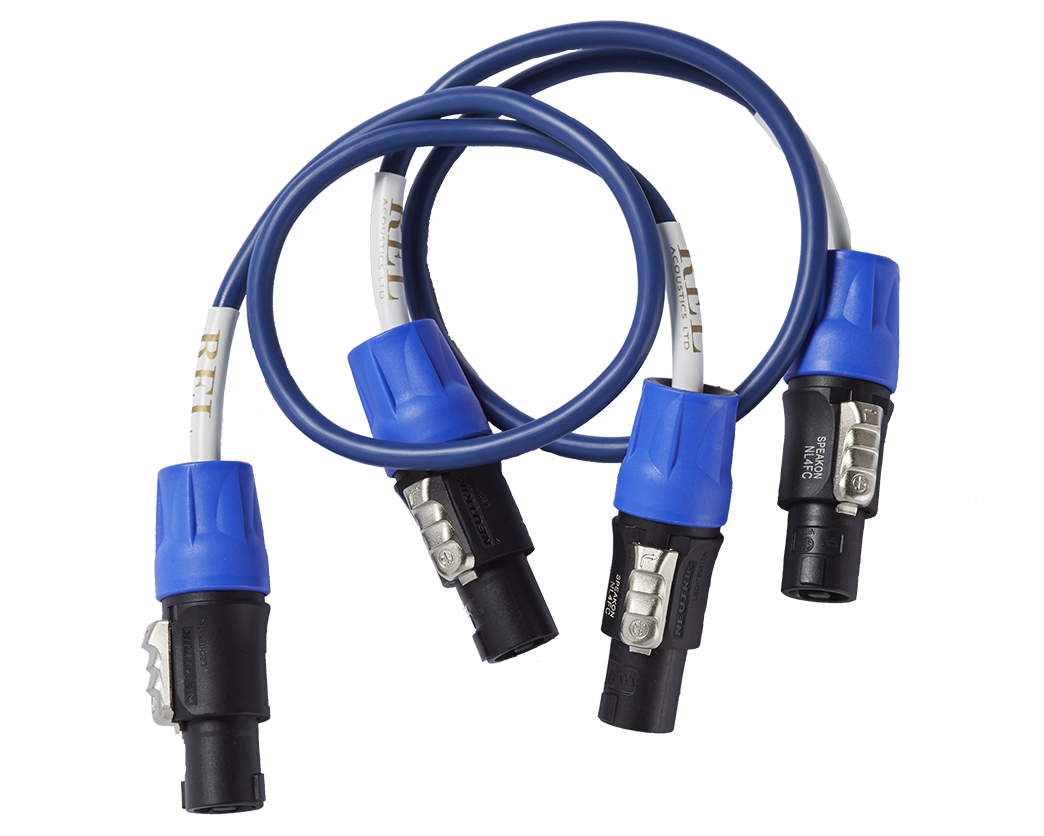
When you get your new REL sub home, if it’s not an HT model, if it’s a TX and S a reference, you’re going to see that it has this beautiful cable with a speakon on one end. This plugs in we’ll come back to the speakon in a minute, and then you’ll see three wires. Now, basic coding of life is that hot colors are hot.
That would be the red and the yellow and black is ground. Right. We deliver them exactly like this. I just took the bag off this two minutes ago. And you can see that we’ve actually pre-stripped this. Now this is not connected to an RCA. Just want to make very, very clear. This is a high level connection. All right.
High level, meaning it’s coming off the binding posts on the back of your power amplifier. The purpose of this whole thing is to give the REL the same input signal, meaning the entire chain of custody, right? Sources, cables all the way through preempt amp, all of that. That’s what we need to feed through to the REL.
So that it’s dynamic and tonal signature is exactly what your speakers are being sent. We don’t supply them with connectors. Why? Well, because five-way binding post vary so much. Some of them work brilliantly with bananas. Other ones work really well with spades. We don’t know what you’ve got.
We don’t know how much space you have, but what we do know is if we supply it with 22 gauge, really high quality copper, pre stripped. Now we start the stripping and I’m going to show you. There’s a real pro tip here, everybody that gets these the first time he asked him off. Now you got two inches of copper that wants to fray and split and short, be very careful.
You do not want to have dead shorts happening. I’m going to show you and we may have to cut away here. Oh, this one’s nice and smooth. You want to pull this back? About half the distance. So you can see this red piece is about two inches, about 50 millimeters long. We don’t want to just pull that off. Want to leave that on.
Why? Because what we’re going to do is actually pull this over the connector and leave this on so that it remains an insulator. We’re going to do this right now. I’ve just bent this into a little horseshoe, right? And I’m going to slip this over this connector right here. Just like this. We do this in the field all the time. Right, and then we snug this down really nice and tight.
There we go. Now we have a perfect really tight connection here and it can’t short to anything. So if I then go for example and put on, do the same exact thing with the yellow and connect this up to this hot connector over here and repeat the process, these can’t short. This is just an insulator, works brilliantly.
The other pro tip then is if your speaker cables are connected, for example spade, you would probably want to go with a banana for these. It’s really important to understand you want to have a really good, solid, tight connection for your main speakers. If you’re using spade, we recommend that when you go to connect the RELs up, you use a banana because that doesn’t interfere with your primary connection.
Conversely, this would be what I would do if the customer were using banana connectors for their speakers. That make sense? So go with this connection. When you’ve got bananas that are your primary speaker to amplifier connection and go with the inverse, go with bananas on this anytime that you’re dealing with somebody who’s already got spades that are mounted hard, really nicely clamped down tightly at the amplifier for example.